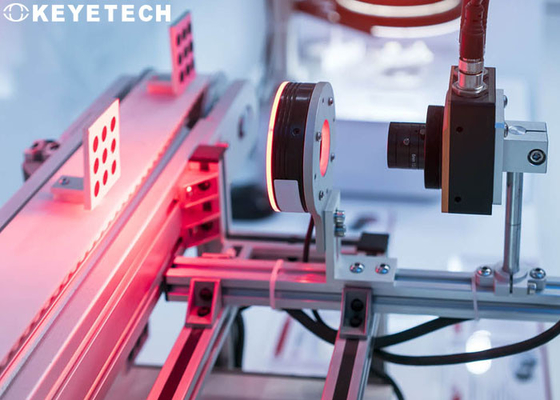
High Presicion & Accuracy Visual Inspection System For Industry Components
Inspection background
The automatic appearance inspection system of machine vision inspection equipment is mainly suitable for the appearance, size and defects of precision hardware commodities, electronic components, ceramic parts, rubber silicone, screws and nuts, mobile phone accessories, automotive fasteners, aviation fasteners and other commodities. wait for automatic filtering. If human inspection is used to inspect the shape, size and quality of the product, the human eye will be easily fatigued if the human eye is used for a long time, resulting in low work efficiency and increased product failure rate.

Automated machine vision inspection equipment is suitable for multi-product inspection such as rubber rings, screws, nuts, mobile phone parts, stainless steel, aluminum, plastics, hardware accessories, automotive fasteners, springs, electronic parts and other products.
Inspection principle
The automated visual inspection equipment converts the target captured by the CCD camera into an image signal, and transmits it to a dedicated image processing system, and converts it into a digital signal according to pixel distribution, brightness, color and other information; the image system performs various operations on these signals to extract. The characteristics of the target, and then control the operation of the equipment on the site according to the result of the judgment. Hardware detection and screening equipment is composed of automatic feeding system, transmission positioning system, automatic measurement system, automatic sorting and blanking system, measurement and control system, and computer data processing system, which can automatically detect various types of hardware. Its workflow is as follows:

1. The hardware is arranged in an orderly manner through a vibrating plate and a conveyor belt, transported to the front end of the linear track, and then enters the rotating glass plate;
2. The glass plate is running and the hardware is brought under the camera to take pictures;
The photos are transmitted to the KEYE TECH vision software system for high-speed, high-precision, high-stability real-time detection, analysis, and calculation, to detect specific defects and distinguish good and bad products;
3. Finally, the system controls the equipment action on site according to the result of the judgment, and the defective products are automatically eliminated;
At the same time, the system will also make statistics on all test results, record the number of hardware and the number of unqualified hardware, which is convenient for real-time monitoring of product quality and facilitates later management and traceability.
System Operating Parameters:
This plan requires preliminary communication between the two parties, and comprehensively considers the complexity and feasibility of the system. The confirmation of bottle testing requirements and indicators is as follows:
| System operating parameters |
| System size |
See design drawings for details |
Voltage and current |
220V 20A 50HZ |
| Equipment Power |
5.0-6.0kw |
Compressed Air |
0.5~0.8Mpaclean And Oil-Free |
| Ambient Temperature |
-20℃ ~ 60℃ |
Environment Humidity |
Below 50% Relative Humidity |
System advantages
- 1. The distance between any circles can be checked;
- 2. It can check the distance between the boundaries of any components;
- 3. It can check the center distance, far center distance and near center distance from any boundary to the center of the circle;
- 4. Check whether the stamped product is inclined, missing or abnormal in size;
- 5. Perform the inspection at the same time, and the conclusion can be exported through COM, I/O, Internet, etc.;
- 6. You can store and view inspection images;

 Your message must be between 20-3,000 characters!
 Please check your E-mail!
  Your message must be between 20-3,000 characters!
 Please check your E-mail!


